Wednesday, July 17, 2013

Fairy Garden Wagon

I have enjoyed looking at Fairy Gardens on Pinterest and Flea Market Gardening and starting thinking about creating one of my own.   


My three sons had a red wagon that is now about 20 years old.  I couldn't bear to throw it out as I remember they had so many fun adventures playing with it.  They even made a covered wagon out of it for Land Run Day ( with a little help)  and carted around pets, friends and whatever else they could find!


I left it out in the garden and have had herbs planted in it.  Now, it's old and rusted and missing two wheels...I did find out I can purchase new wheels online.   I thought it would be a perfect place and container for a fairy garden!    


I just used some plastic trash bags to cover the bottom so the soil wouldn't fall through.  I did punch some small holes for drainage.


I added good quality potting soil and mounded the soil higher in a couple places so that the garden wasn't totally flat. 


I think mixing low ground covers and taller plants with different textures and colors make the prettiest fairy gardens.


Moss, twigs and rocks also add to the garden.


I'd been looking for a miniature house or cottage that was weather resistant but they can be a little pricey, so I looked around my house,  a few flea markets and Goodwill and found pieces that would work without breaking the bank!


The little house was hand painted and the artist's name is on the bottom with the date of 1961.   I found it at an antique booth on sale for just a few dollars.   


I did buy the little bistro set, bee skep and birdbath at a garden shop but everything else was 
re-purposed or used.  


The roundhouse was a candle lantern that was out in my garden...nice and rusty and it even has a small door than opens and closes. 


  This time of year bedding plants are on sale and heavily discounted so I was able to get all 
the plants  for less than $10.00. 


The white little picket fence is actually a planter I found at Goodwill for only 50 cents!   


I made the garden arbor to welcome the fairies.  I used sticks  from my garden and tied a a bit of lavender at the top.  Lavender was used in medieval    
times for protection and relaxation.  


I used some glass beads leftover from a flower arrangement I had received to mark out a path to the roundhouse.  Accessorizing is so much fun and of course you can buy so many cute things on the internet or better yet repurpose things and get creative.  


I'm on the lookout for a little twig ladder so the gnomes can climb up into the wagon...since of course, only the fairies can fly.   


This would be a fun project to do with children or an elderly person who has a love of gardening and can no longer work outside.  


Have fun!

I'm linking with Tootsie's Flaunt Your Flowers


Tuesday, July 9, 2013

Lavender Farm & Vignette


Lavender is my favorite herb!  I love that it grows here in Oklahoma and with little effort.  It almost thrives on neglect and dry hot summers.   It is not without some problems and too much moisture and humidity can cause the plants to die so selecting the proper planting place in the garden is important. 


I have loved lavender for many years and have grown several varieties in my garden.  I love the look of Spanish lavender with it's pretty frilly blossoms, but it's not a great one for drying since it has short stems.   I have tended  to "over-care" for my lavender plants  and find that I can overwater  easily.   I now make sure I plant it in full sun and in the drier part of my garden. 


   I grow Grosso and Provence and the flowers dry very well and have the strongest oils with nice long stems for cutting.   


Country Cottage Primitives Lavender Farm

I love visiting lavender farms and have been to several in other states.  We are fortunate to have a wonderful farm just 30 miles from Oklahoma City.   A "lively" group of my friends took a field trip to our local lavender farm last week.  


Country Cottage Primitives Lavender Farm  located just outside Shawnee, Oklahoma boasts a darling gift shop, barn and workshop.  The lavender field is right behind the shop and was
 in full bloom for our visit! 


Workshop


 The workshop was so much fun and we each made (or attempted to make)  a  lavender wand while the owner taught  us about the history, uses and 
cultivation of lavenders. 
She and her gracious staff  served us 
lavender lemonade, 
strawberry-lavender jam and 
lavender infused cookies.   Yum!


 We were each given clippers,  a basket and a quick lesson on how to cut and harvest the stems.   Armed with sharp clippers you make a cut at the base of the stem where the leaves begin on the plant.  
We each cut a lovely bouquet to take home. 

My bouquet included Grosso, Provence and Alba
 which is a white variety.   I was also able to purchase two plants of the white variety 
from the farm and 
plant them in my garden!
The bouquet in the herb vase, pictured below
 is  from the herb farm.    


The tied bundles were from two of my plants that I harvested when I got home.  I learned that I need to harvest the stems just as the buds are
 starting to open instead of waiting.  The bundles should then be hung upside down out of direct sunlight for two weeks for drying and secured with a rubber band.    I did finally end up with 5 bundles from my little plants.   I've added 4 additional plants and next year I will be ready for the harvest!  
   If I can get Mr. Bloomers to build me a few more raised beds I'm filling them with lavender plants. 


A couple months ago Mr. Bloomers and I were in Texas and we visited Becker Vineyards and their lavender field.   Becker Vineyards is located outside of Fredericksburg and they grow Spanish lavender.
The day before we arrived a Febreeze commercial had been filmed there.  This lavender is 
going to be famous!  


Becker Vineyard and Lavender

They sell wonderful lavender products in their shop and I purchased some essential oil and spray.   I use the spray on my bed linen and as a spritzer when I come in from the garden...very cooling and  refreshing.   I also spray my dogs with it since it's suppose to deter fleas but I think it just makes them smell better!  Lavender is said to promote sleep,  calmness and back in medieval days was even used for protection against evil spirits!


After harvesting my lavender I trimmed off the excess stem lengths and then cut them into smaller pieces.   All the leaves and stems went into a pretty lace bag that I had collected with some lavender seeds I purchased in Santa Fe.   The stems and leaves are very aromatic as well and I just add a few drops of oil when the scent fades. 


Blooms from my chaste tree compliment my little vignette.  I love the blooms from the  tree 
as it reminds of  lavender and lilacs.  


Chaste tree


My lavender tray stays on my vanity so
 I can enjoy lavender all year long! 

The simple joys in life!

I'm linking with Susan's Outdoor Wednesday
and


Thursday, July 4, 2013

Outdoor Chandelier

I was excited to find my outdoor chandelier
 project featured on Flea Market Gardening's website.  If you haven't visited their facebook page or website and love flea market goodies, then go check them out!   This is a great place to find and exchange ideas for repurposing items
 for the garden!  


Sue has organized reader's photos into
 wonderful albums. 


I purchased the chandelier at a garage sale for $8 and it's been hanging in the corner of my garage for many years.  I had originally intended to use it in the dining room but my sweet and sometimes not too careful husband broke 3 of the glass shades while hanging his bike up.    In the end the chandelier didn't look right with my dining room furniture anyway...so it stayed back in 
the corner until Pinterest came along!

Via Pinterest:


I have been eyeing outdoor chandeliers on
Pinterest and got the idea to use that 
old chandy outside.


I removed the top three wired bulb holders with some pliers but left the bottom tier bulb holders intact in case I ever wanted to use 
taper candles in them.  I also removed part of the wiring at the top, the ceiling cover and some of the chain.  Even me a girlie- girl can do this! 


Next I wraped each of the interior of the glass shades on the lower tier  with some sheet moss and added a little bit of potting soil and placed one bedding plant in each shade.  I chose asparagus ferns and impatiens and they fit perfectly into each shade. 


 The ferns will eventually trail and the impatiens will add some color.    The nice thing is the shades come off easily and I can change out to candles for more light if need be.  Also the flowers can be changed seasonally. 


I added votive glass candle holders to the top tier and then hung the chandelier from a tree on a large s-hook.  This makes it easy to take down in the event of a storm or move to another location.   


This was an easy project and I wish I
 had finished it sooner ...thanks to Pinterest 
for the inspiration!


Happy Fourth of July!

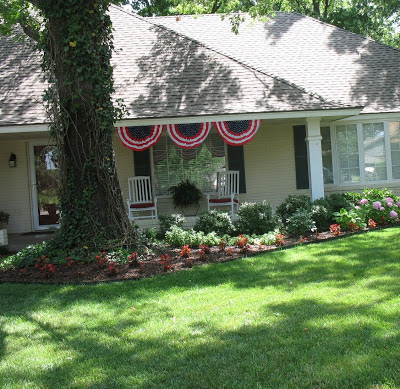
We've got our red, white and blue on the porch! 


I'm linking 

with Tootsie's Fertilizer Friday
and Susan's Metamorphosis Monday